Organization Setup
I. Register Organization
Step 1: Register
Register an account quickly at the following link https://app.simplamo.com/sign-up

Step 2: Activate
Fill in all the information step by step and check your email to activate your account.
**Note: Each organization will have its own registered domain name in the form of:
[Abbreviation of the Organization].simplamo.com
This will be the official access domain of your Organization.

II. Set up Organization
Let’s set up a more friendly interface that align with your Organization's brand by updating the Logo and necessary Business Information by 2 steps:
Step 1: Logo & Name
- Select "Settings" on the left toolbar
- Choose "Company" on the horizontal toolbar
![]()
- Continue to click on the Company name to update the Logo & short name
![]()
Step 2: Create Users
Add all relevant members in your Business to Simplamo.
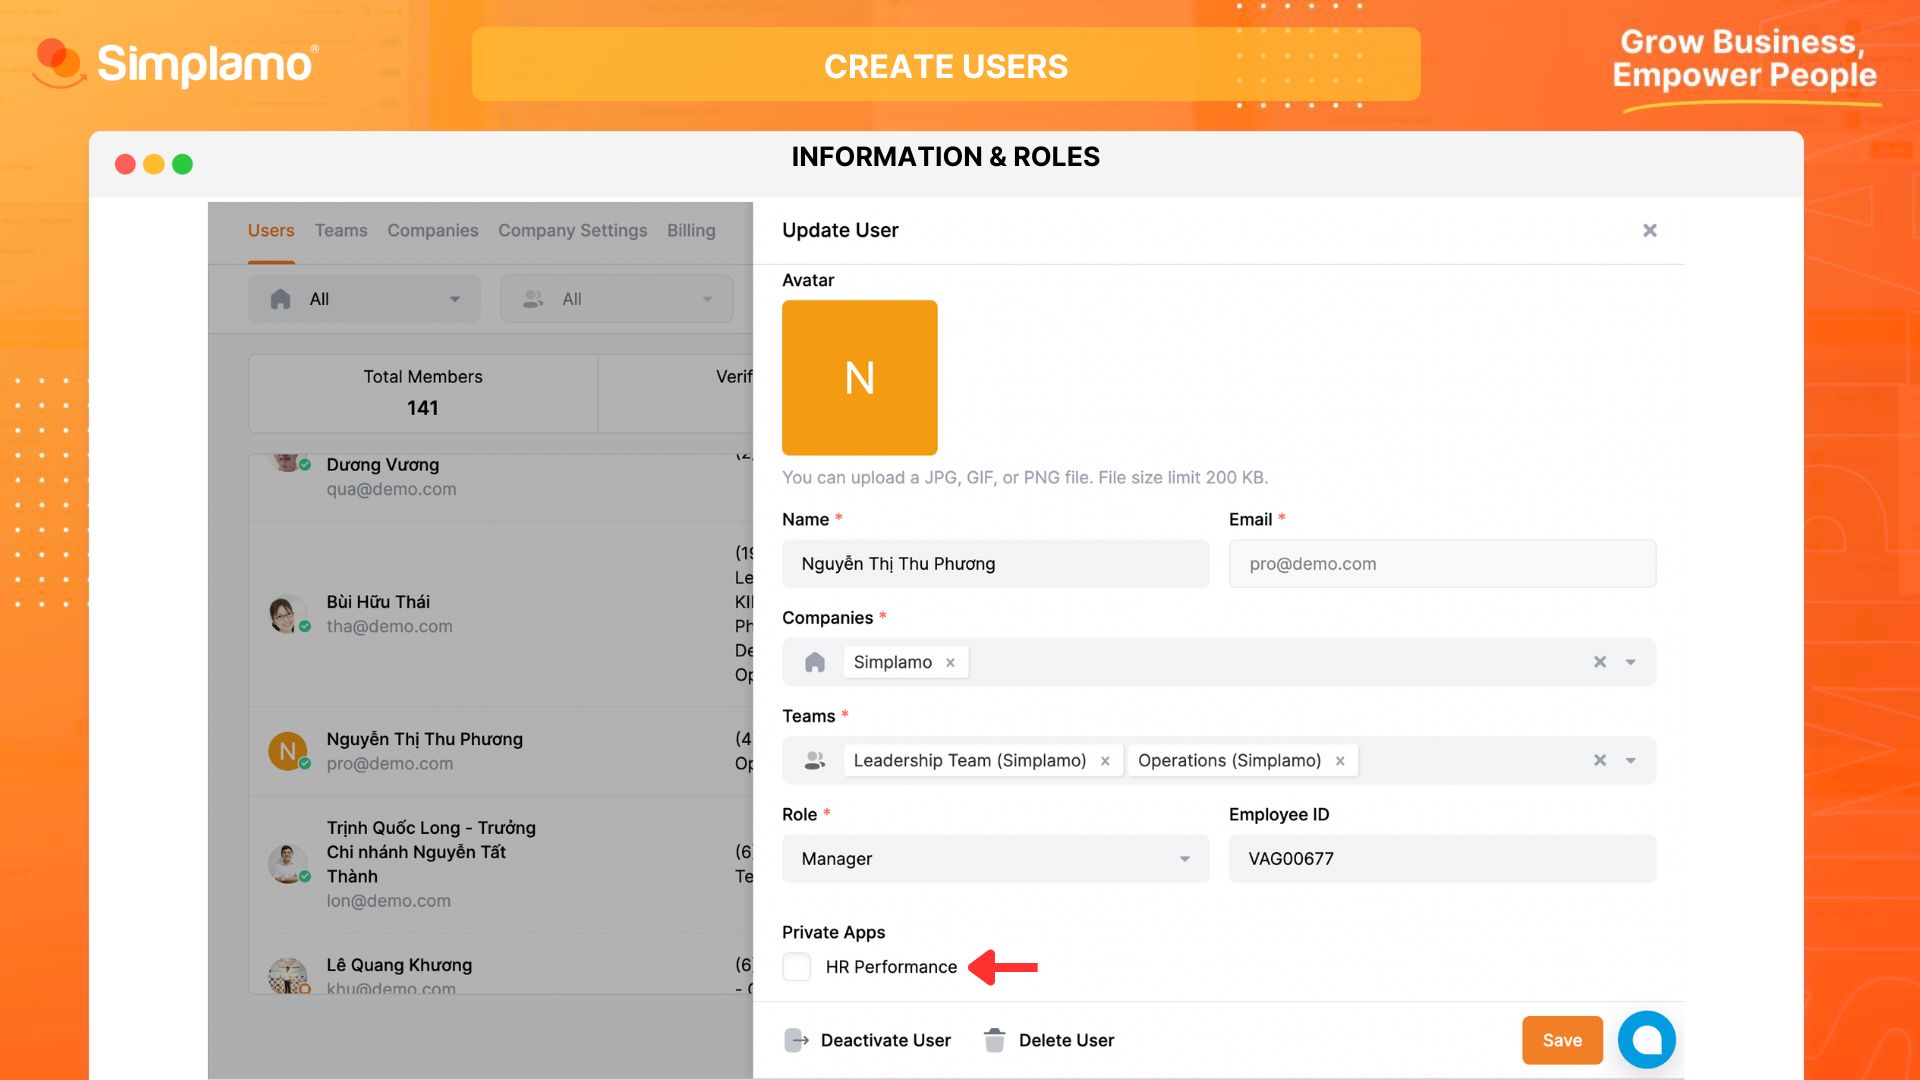
2.1 Create Users
- On the left toolbar of the screen, select "Settings"
- In the "Users" section, click on "Create New"
- Then start filling in the user information according to the available form and tick on the box "HR Performance".
![]()
2.2 User’s Roles
In the "Roles" section, you need to pay attention to the following permissions to make appropriate choices.
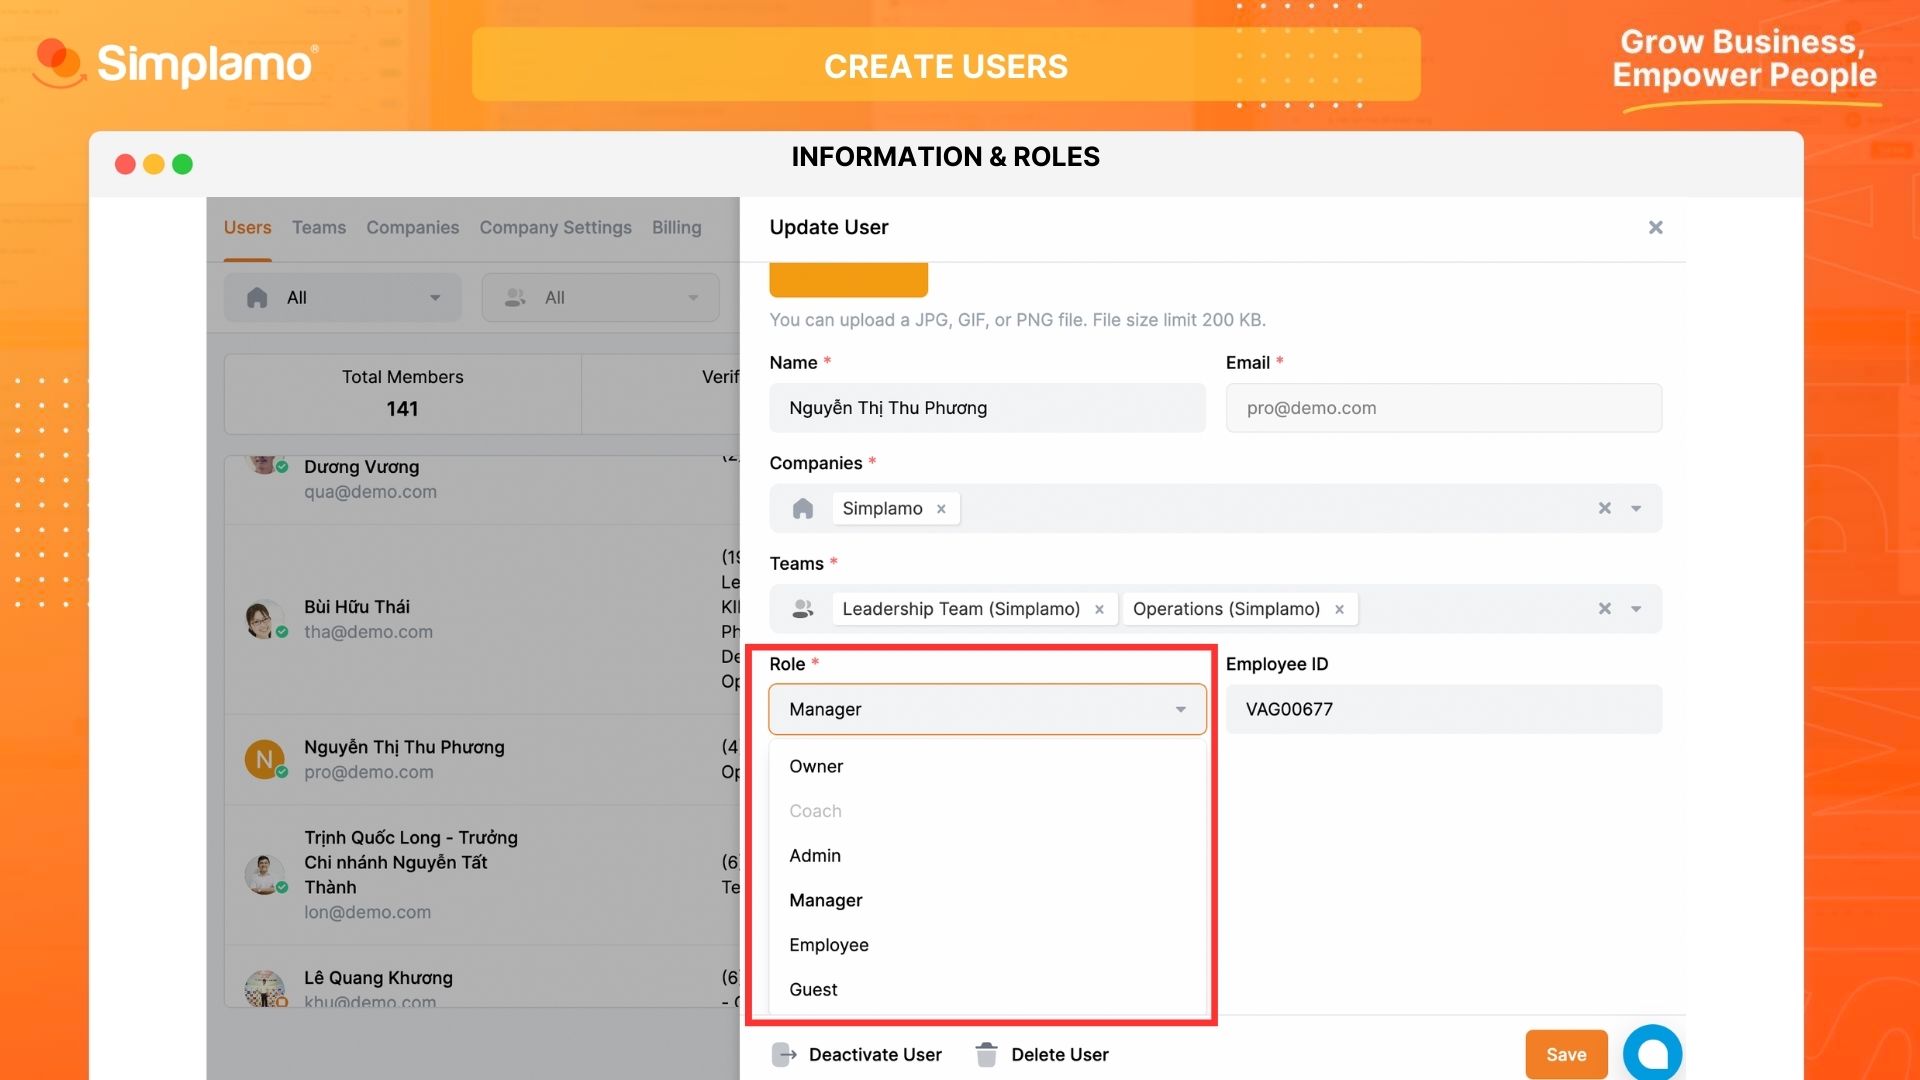
1. Owner:
Permissions: Full control rights over the Simplamo system: manage, delete or add accounts, access, edit data for all Companies.
- If the Owner does not belong to any company or team, they can still access the data of the company and team to view, manage, and adjust. However, when creating data (Goals, Metrics, To-dos, ...), it is not possible to specify users who do not belong to that group.
- Owners can view invoice information and receive invoice notifications.
Limitation: None
2. Admin:
- Permissions: Full system management rights like the Owner.
- Limitation: Can view the list of companies but cannot add, edit, and delete Companies.
3. Manager
Permissions: Users with the authority to manage, access, and edit data of a specific department/team.
- Can create and edit information about the groups or users they manage
- Can view data of any teams they are added into.
Limitation:
- Cannot view other people's conversation
- Cannot access invoice information
- Cannot access Business Session
- Unable to access Companies they do not belong to.
4. Employee:
Permissions: Users have the right to manage and edit their own data, view data of their department/team and the company they are added into.
Restrictions:
- Unable to view other people's Conversations
- Not allowed to edit Organizational Chart, Vision, Processes
- Unable to access Settings page.
Step 3: Create a team
A default, Simplamo automatically sets up common teams for most Organizations
| Name | Description |
|---|---|
| Leadership Team | The team responsible for company's main activities that includes department heads at the C level |
| Finance | The team responsible for financial activities such as accounting, CFO |
| Sales | The team responsible for Sales activities |
| Marketing | The team responsible for Marketing activities |
| Operations | The team responsible for Operational activities |
You can also add additional Departments/Teams in the "Teams" section - Click on the "Create New" button and sequentially add information, select the Company for this team, and related members.

Step 4: Invite Users to the Group
Invite other users to the Organization, and appropriate functional teams by
- Select Team → Add users as members of the team.

III. Personal Information
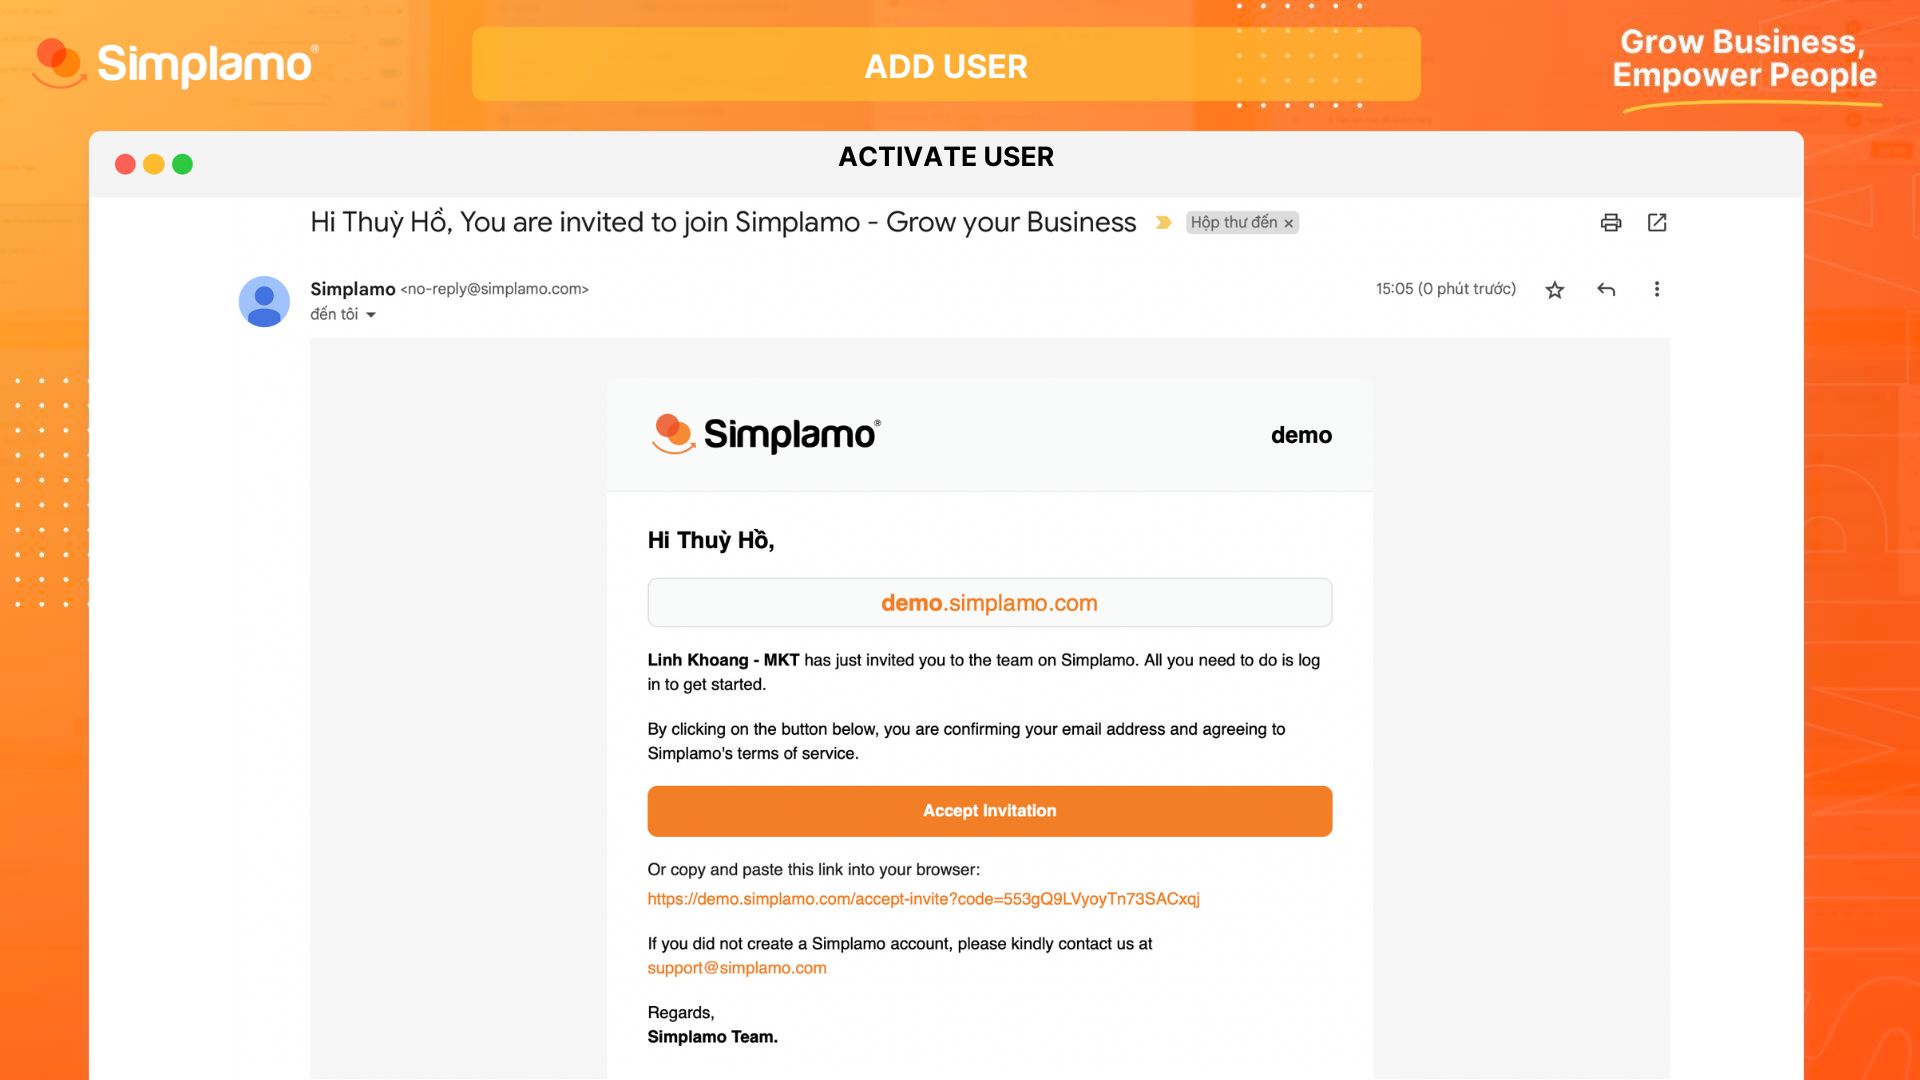
Step 1: Activate
After being added to the workspace by the Owner, each user should monitor their Email to activate the account by selecting the "Accept Invitation" button.
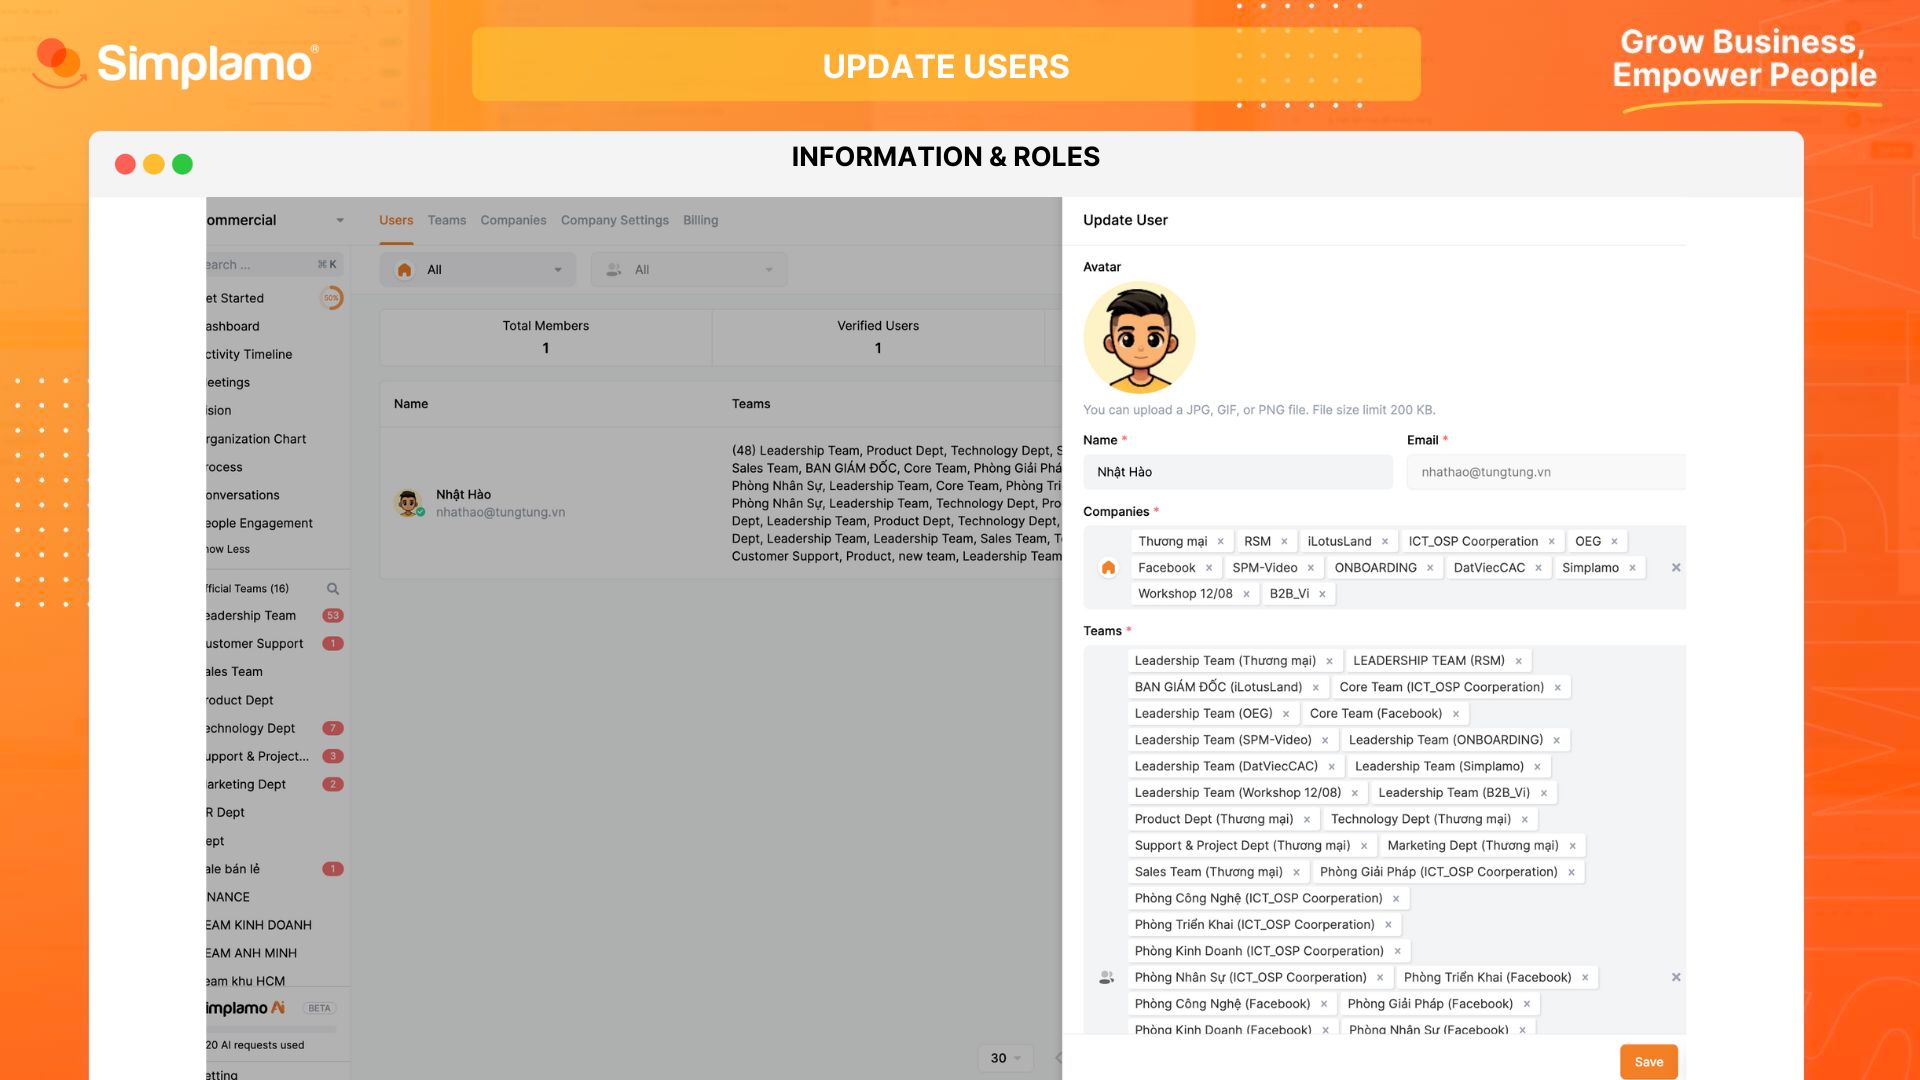
Step 2: Information & Logo
Simplamo encourages users to change their profile picture - this helps create a genuine and vibrant system for your company's workspace.
In case you have not found any suitable image to be your avatar, we do have some animated options in stock:
![]()
Now that you have set up a working system for your organization on the Simplamo platform, remind each member to access their email to activate their account and start using it.
After setting up the workspace for the organization, the first important step in business management is to establish the Organization Chart with the right structure.